安装环境:CentOS7 64位 MINI版
官网源码编译安装文档:http://dev.mysql.com/doc/refman/5.7/en/source-installation.html
一、系统安装条件
官方文档说明:http://dev.mysql.com/doc/refman/5.7/en/source-installation.html
1> cmake
MySQL使用cmake跨平台工具预编译源码,用于设置mysql的编译参数。如:安装目录、数据存放目录、字符编码、排序规则等。安装最新版本即可。
2> make3.75
mysql源代码是由C和C++语言编写,在linux下使用make对源码进行编译和构建,要求必须安装make 3.75或以上版本
3> gcc4.4.6
GCC是Linux下的C语言编译工具,mysql源码编译完全由C和C++编写,要求必须安装GCC4.4.6或以上版本
4> Boost1.59.0
mysql源码中用到了C++的Boost库,要求必须安装boost1.59.0或以上版本
5> bison2.1
Linux下C/C++语法分析器
6> ncurses
字符终端处理库
所以在安装前,需先安装相关的依赖库:
shell> sudo yum install -y cmake,make,gcc,gcc-c++,bison, ncurses,ncurses-devel
下载Boost1.59.0源代码,并解压到/usr/local/目录下:
shell> wget -O https://sourceforge.net/projects/boost/files/boost/1.59.0/boost_1_59_0.tar.gzshell> tar -zxvf boost_1_59_0.tar.gz -C /usr/local/
二、下载MySQL源码
从github上下载mysql的源码
shell> cd /optshell> git clone https://github.com/mysql/mysql-server.gitshell> ls mysql-server
如果没安装git客户端,执行yum install -y git安装。

shell> git branch -rorigin/5.5origin/5.6origin/5.7origin/HEAD -> origin/5.7origin/cluster-7.2origin/cluster-7.3origin/cluster-7.4origin/cluster-7.5
当前分支默认为5.7版本,如果要安装其它版本,切换到相应的分支即可。如安装5.6版本:git checkout 5.6,这里以安装5.7为例。
搜狐镜像下载地址:
http://mirrors.sohu.com/mysql/MySQL-5.5/
http://mirrors.sohu.com/mysql/MySQL-5.6/
http://mirrors.sohu.com/mysql/MySQL-5.7/
三、安装
1> 添加mysql用户
shell> cd /opt/mysql-servershell> groupadd mysql #添加mysql用户组shell> useradd -r -g mysql -s /bin/false mysql #添加mysql用户
2> 配置mysql预编译参数
shell> cmake . -DCMAKE_INSTALL_PREFIX=/usr/local/mysql /-DMYSQL_DATADIR=/usr/local/mysql/data /-DWITH_BOOST=/usr/local/boost_1_59_0 /-DSYSCONFDIR=/etc /-DEFAULT_CHARSET=utf8mb4 /-DDEFAULT_COLLATION=utf8mb4_general_ci /-DENABLED_LOCAL_INFILE=1 /-DEXTRA_CHARSETS=all
-DCMAKE_INSTALL_PREFIX:安装路径
-DMYSQL_DATADIR:数据存放目录
-DWITH_BOOST:boost源码路径
-DSYSCONFDIR:my.cnf配置文件目录
-DEFAULT_CHARSET:数据库默认字符编码
-DDEFAULT_COLLATION:默认排序规则
-DENABLED_LOCAL_INFILE:允许从本文件导入数据
-DEXTRA_CHARSETS:安装所有字符集
更多预编译配置参数请参考mysql官方文档说明:http://dev.mysql.com/doc/refman/5.7/en/source-configuration-options.html#cmake-general-options
3> 编译并安装
shell> make -j `grep processor /proc/cpuinfo | wc -l`shell> make install
-j参数表示根据CPU核数指定编译时的线程数,可以加快编译速度。默认为1个线程编译,经测试单核CPU,1G的内存,编译完需要将近1个小时。
4> 初始化系统数据库
shell> cd /usr/local/mysqlshell> chown -R mysql:mysql .# 注意:MySQL 5.7.6之前的版本执行这个脚本初始化系统数据库shell> ./bin/mysql_install_db --user=mysql --basedir=/usr/local/mysql --datadir=/usr/local/mysql/data# 5.7.6之后版本初始系统数据库脚本(本文使用此方式初始化)shell> ./bin/mysqld --initialize-insecure --user=mysql --basedir=/usr/local/mysql --datadir=/usr/local/mysql/datashell> ./bin/mysql_ssl_rsa_setupshell> chown -R root .shell> chown -R mysql data
注意:如果使用–initialize参数初始化系统数据库之后,会在~/.mysql_secret文件中生成root用户的一个临时密码,同时也在初始化日志中打印出来了,如下图红圈中所示:

5、配置文件及参数优化
shell> cp support-files/my-default.cnf /etc/my.cnfshell> vim /etc/my.cnf[client]port=3306socket=/usr/local/mysql/mysql.sock[mysqld]character-set-server=utf8collation-server=utf8_general_ciskip-external-lockingskip-name-resolveuser=mysqlport=3306basedir=/usr/local/mysqldatadir=/usr/local/mysql/datatmpdir=/usr/local/mysql/temp# server_id = .....socket=/usr/local/mysql/mysql.socklog-error=/usr/local/mysql/logs/mysql_error.logpid-file=/usr/local/mysql/mysql.pidopen_files_limit=10240back_log=600max_connections=500max_connect_errors=6000wait_timeout=605800#open_tables=600#table_cache = 650#opened_tables = 630max_allowed_packet=32Msort_buffer_size=4Mjoin_buffer_size=4Mthread_cache_size=300query_cache_type=1query_cache_size=256Mquery_cache_limit=2Mquery_cache_min_res_unit=16ktmp_table_size=256Mmax_heap_table_size=256Mkey_buffer_size=256Mread_buffer_size=1Mread_rnd_buffer_size=16Mbulk_insert_buffer_size=64Mlower_case_table_names=1default-storage-engine=INNODBinnodb_buffer_pool_size=2Ginnodb_log_buffer_size=32Minnodb_log_file_size=128Minnodb_flush_method=O_DIRECT#####################thread_concurrency=32long_query_time=2slow-query-log=onslow-query-log-file=/usr/local/mysql/logs/mysql-slow.log[mysqldump]quickmax_allowed_packet=32M[mysqld_safe]log-error=/var/log/mysqld.logpid-file=/var/run/mysqld/mysqld.pid
6、配置mysql服务
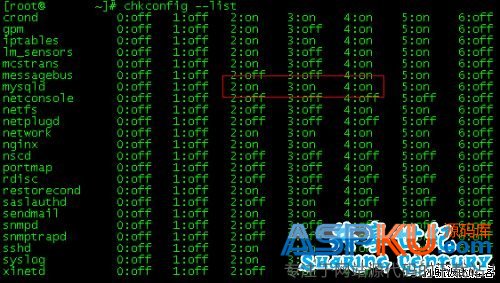
shell> cp support-files/mysql.server /etc/init.d/mysqldshell> chkconfig --add mysqld # 添加到系统服务shell> chkconfig mysqld on # 开机启动
7、启动服务
shell> service mysqld start # 启动mysql服务shell> service mysqld stop # 停止mysql服务shell> service mysqld restart # 重新启动mysql服务
8、设置数据库密码
shell> /usr/local/mysql/bin/mysql -e "grant all privileges on *.* to root@'127.0.0.1' identified by "root" with grant option;"shell> /usr/local/mysql/bin/mysql -e "grant all privileges on *.* to root@'localhost' identified by "root" with grant option;"# 开启远程登录(将host设为%即可)/usr/local/mysql/bin/mysql -e "grant all privileges on *.* to root@'%' identified by "root" with grant option;"
9、配置mysql环境变量
shell> vim /etc/profileshell> export PATH=/usr/local/mysql/bin:$PATHshell> source /etc/profile
四、其它注意事项
如果中途编译失败了,需要删除cmake生成的预编译配置参数的缓存文件和make编译后生成的文件,再重新编译。
shell> cd /opt/mysql-servershell> rm -f CMakeCache.txtshell> make clean
以上就是本文的全部内容,希望对大家的学习有所帮助,也希望大家多多支持CuoXin错新网。
新闻热点


疑难解答