网站设计制作过程中有个环境很重要,那就是网站的样式布局。这个过程就会牵涉到CSS样式代码的使用,很多朋友对CSS样式代码是又爱又恨,爱是因为CSS代码能实现很多漂亮多样的效果,很则是,CSS掌握起来并不容易,不是特别好操作,而且如果操作不好,对网站的加载速度,以及网站页面的兼容性都会产生影响。今天361源码抛开加载速度和兼容性,就事论事的和大家侃侃CSS的一些常见用法和使用技巧.
 1、文字的水平居中
将一段文字置于容器的水平中点,只要设置text-align属性即可:
text-align:center;
2、容器的水平居中
先为该容器设置一个明确宽度,然后将margin的水平值设为auto即可。
#container {
width:760px;
margin:0 auto;
}
3、文字的垂直居中
单行文字的垂直居中,只要将行高与容器高设为相等即可。
比如,容器中有一行数字。
<div id="container">1234567890</div>
然后CSS这样写:
#container {height: 35px; line-height: 35px;}
如果有n行文字,那么将行高设为容器高度的n分之一即可。
4、容器的垂直居中
比如,有一大一小两个容器,请问如何将小容器垂直居中?
<div id="big">
<div id="small">
</div>
</div>
首先,将大容器的定位为relative。
#big{
position:relative;
height:480px;
}
然后,将小容器定位为absolute,再将它的左上角沿y轴下移50%,最后将它margin-top上移本身高度的50%即可。
#small {
position: absolute;
top: 50%;
height: 240px;
margin-top: -120px;
}
使用同样的思路,也可以做出水平居中的效果。(361资源网提醒:这一种定位方法在很多弹出层,广告效果中使用很多,是非常使用的效果之一。)
5、图片宽度的自适应
如何使得较大的图片,能够自动适应小容器的宽度?CSS可以这样写:
img {max-width: 100%}
但是IE6不支持max-width,所以遇到IE6时,使用IE条件注释,将语句改写为:
img {width: 100%}
6、3D按钮的CSS代码
要使按钮具有3D效果,只要将它的左上部边框设为浅色,右下部边框设为深色即可。
#button {
background: #888;
border: 1px solid;
border-color: #999 #777 #777 #999;
}
7、font属性的快捷写法
font快捷写法的格式为:
body {
font: font-style font-variant font-weight font-size line-height font-family;
}
所以:
body {
font-family: Arial, Helvetica, sans-serif;
font-size: 13px;
font-weight: normal;
font-variant: small-caps;
font-style: italic;
line-height: 150%;
}
可以被写成:
body {
font: italic small-caps normal 13px/150% Arial, Helvetica, sans-serif;
}
8、link状态的设置顺序
link的四种状态,需要按照下面的前后顺序进行设置:
a:link
a:visited
a:hover
a:active
9、IE条件注释
你可以利用条件注释,设置只对IE产生作用的语句:
<!--[if IE]>
<link rel="stylesheet" type="text/css" href="ie-stylesheet.css" />
< ![endif]-->
还可以区分各种不同的IE版本:
<!--[if IE 6]> - targets IE6 only -->
<!--[if gt IE 6]> - targets IE7 and above -->
<!--[if lt IE 6]> - targets IE5.5 and below -->
<!--[if gte IE 6]> - targets IE6 and above -->
<!--[if lte IE 6]> - targets IE6 and below -->
10、IE6专用语句
IE专用语句方法一:
由于IE6不把html视为文档的根元素,所以利用这一点,可以写出只有IE6才能读到的语句:
/* the following rules apply only to IE6 */
* html{
}
* html body{
}
* html .foo{
}
IE7专用语句则要写成
/* the following rules apply only to IE7 */
*+html .foo{
}
IE专用语句方法二:
除了IE6以外,所有浏览器都不能识别属性前的下划线。而除了IE7之外,所有浏览器都不能识别属性前的*号,因此可以写出只有这两个浏览器才能读到的语句:
.element {
background: red; /* modern browsers */
*background: green; /* IE 7 and below */
_background: blue; /* IE6 exclusively */
}
11、CSS的优先性
如果同一个容器被多条CSS语句定义,那么哪一个定义优先呢?
基本规则是:
行内样式 > id样式 > class样式 > 标签名样式
比如,有一个元素:
行内样式是最优先的,然后其他设置的优先性,从低到高依次为:
div < .class < div.class < #id < div#id < #id.class < div#id.class
12、IE6的min-height
IE6不支持min-height,有两种方法可以解决这个问题:
方法一:
.element {
min-height: 500px;
height: auto !important;
height: 500px;
}
共有三条CSS语句,第一句是针对其他浏览器设置最小高度,第三句是针对IE设置最小高度,第二句则是让其他浏览器覆盖第三句的设置。
方法二:
.element {
min-height: 500px
_height: 500px
}
_height只有IE6能读取。
13、font-size基准
浏览器的缺省字体大小是16px,你可以先将基准字体大小设为10px:
body {font-size:62.5%;}
后面统一采用em作为字体单位,2.4em就表示24px。
h1 {font-size: 2.4 em}
14、Text-transform和Font Variant
Text-transform用于将所有字母变成小写字母、大写字母或首字母大写:
p {text-transform: uppercase}
p {text-transform: lowercase}
p {text-transform: capitalize}
Font Variant用于将字体变成小型的大写字母(即与小写字母等高的大写字母)。
p {font-variant: small-caps}
15、CSS重置
这个方法通常用来清除浏览器内置的默认样式。通常,所有的字体和line-height都设置为100%,margin、padding设置为0px,去掉border,列表也无样式。
比如我们最常见到的css重置代码:
body,div,dl,dt,dd,ul,ol,li,h1,h2,h3,h4,h5,h6,form,fieldset,input,textarea,p,th,td {
margin:0;
padding:0;
}
table {
border-collapse:collapse;
border-spacing:0;
}
img {
border:0;
}
ol,ul {
list-style:none;
}
h1,h2,h3,h4,h5,h6 {
font-size:100%;
font-weight:normal;
}
16、用图片充当列表标志
默认情况下,浏览器使用一个黑圆圈作为列表标志,可以用图片取代它:
ul {list-style: none}
ul li {
background-image: url("path-to-your-image");
background-repeat: none;
background-position: 0 0.5em;
}
17、透明容器设置
将一个容器设为透明,可以使用下面的代码:
.element {
filter:alpha(opacity=50);
-moz-opacity:0.5;
-khtml-opacity: 0.5;
opacity: 0.5;
}
在这四行CSS语句中,第一行是IE专用的,第二行用于Firefox,第三行用于webkit核心的浏览器,第四行用于Opera。
18、CSS三角形
如何使用CSS生成一个三角形?
先编写一个空元素
然后,将它四个边框中的三个边框设为透明,剩下一个设为可见,就可以生成三角形效果:
.triangle {
border-color: transparent transparent green transparent;
border-style: solid;
border-width: 0px 300px 300px 300px;
height: 0px;
width: 0px;
}实例:《table如何实现对角线?用div+css模拟表格对角线》
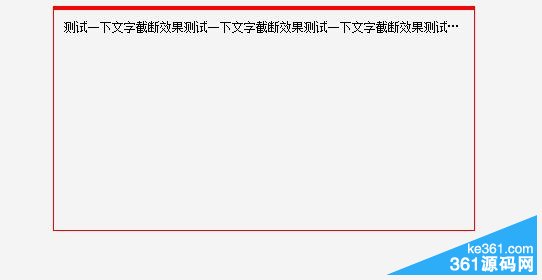
19、禁止自动换行
如果你希望文字在一行中显示完成,不要自动换行,CSS命令如下:
h { white-space:nowrap; }
20、用图片替换文字
有时我们需要在标题栏中使用图片,但是又必须保证搜索引擎能够读到标题,CSS语句可以这样写:
h1 {
text-indent:-9999px;
background:url("h1-image.jpg") no-repeat;
width:200px;
height:50px;
}
21、获得焦点的表单元素
当一个表单元素获得焦点时,可以将其突出显示:
input:focus { border: 2px solid green; }
22、!important规则
多条CSS语句互相冲突时,具有!important的语句将覆盖其他语句。由于IE不支持!important,所以也可以利用它区分不同的浏览器。
h1 {
color: red !important;
color: blue;
}
上面这段语句的结果是,其他浏览器都显示红色标题,只有IE显示蓝色标题。
23、CSS提示框
当鼠标移动到链接上方,会自动出现一个提示框。
<a class="tooltip" href="#">链接文字 <span>提示文字</span></a>
CSS这样写:
a.tooltip {position: relative}
a.tooltip span {display:none; padding:5px; width:200px;}
a:hover {background:#fff;} /*background-color is a must for IE6*/
a.tooltip:hover span{display:inline; position:absolute;}
24、固定位置的页首
当页面滚动时,有时需要页首在位置固定不变,CSS语句可以这样写:
body{ margin:0;padding:100px 0 0 0;}
div#header{
position:absolute;
top:0;
left:0;
width:100%;
height:;
}
@media screen{
body>div#header{position: fixed;}
}
* html body{overflow:hidden;}
* html div#content{height:100%;overflow:auto;}
IE6的另一种写法(用于固定位置的页脚):
* html #footer {
position:absolute;
top:expression((0-(footer.offsetHeight)+(document.documentElement.clientHeight?document.documentElement.clientHeight : document.body.clientHeight)+(ignoreMe = document.documentElement.scrollTop?document.documentElement.scrollTop:document.body.scrollTop))+'px');
}
25、在IE6中设置PNG图片的透明效果
.classname {
background: url(image.png);
_background: none;
_filter:progid:DXImageTransform.Microsoft.AlphaImageLoader
(src='image.png', sizingMethod='crop');
}
26、各类浏览器的专用语句
/* IE6 and below */
* html #uno { color: red }/* IE7 */
*:first-child+html #dos { color: red }/* IE7, FF, Saf, Opera */
html>body #tres { color: red }/* IE8, FF, Saf, Opera (Everything but IE 6,7) */
html>/**/body #cuatro { color: red }/* Opera 9.27 and below, safari 2 */
html:first-child #cinco { color: red }/* Safari 2-3 */
html[xmlns*=""] body:last-child #seis { color: red }/* safari 3+, chrome 1+, opera9+, ff 3.5+ */
body:nth-of-type(1) #siete { color: red }/* safari 3+, chrome 1+, opera9+, ff 3.5+ */
body:first-of-type #ocho { color: red }/* saf3+, chrome1+ */
@media screen and (-webkit-min-device-pixel-ratio:0) {
#diez { color: red }
}/* iPhone / mobile webkit */
@media screen and (max-device-width: 480px) {
#veintiseis { color: red }
}/* Safari 2 - 3.1 */
html[xmlns*=""]:root #trece { color: red }/* Safari 2 - 3.1, Opera 9.25 */
*|html[xmlns*=""] #catorce { color: red }/* Everything but IE6-8 */
:root *> #quince { color: red }/* IE7 */
*+html #dieciocho { color: red }/* Firefox only. 1+ */
#veinticuatro, x:-moz-any-link { color: red }/* Firefox 3.0+ */
#veinticinco, x:-moz-any-link, x:default { color: red }/***** Attribute Hacks ******/
/* IE6 */
#once { _color: blue }/* IE6, IE7 */
#doce { *color: blue; /* or #color: blue */ }/* Everything but IE6 */
#diecisiete { color/**/: blue }/* IE6, IE7, IE8 */
#diecinueve { color: blue/9; }/* IE7, IE8 */
#veinte { color/*/**/: blue/9; }/* IE6, IE7 -- acts as an !important */
#veintesiete { color: blue !ie; } /* string after ! can be anything */
27、容器的水平和垂直居中
HTML代码如下:
<figure class='logo'>
<span></span>
<img class='photo'/>
</figure>
CSS代码如下:
.logo {
display: block;
text-align: center;
display: block;
text-align: center;
vertical-align: middle;
border: 4px solid #dddddd;
padding: 4px;
height: 74px;
width: 74px;
}
.logo * {
display: inline-block;
height: 100%;
vertical-align: middle;
}
.logo .photo {
height: auto;
width: auto;
max-width: 100%;
max-height: 100%;
}
28、CSS阴影
外阴影:
.shadow {
-moz-box-shadow: 5px 5px 5px #ccc;
-webkit-box-shadow: 5px 5px 5px #ccc;
box-shadow: 5px 5px 5px #ccc;
}
内阴影:
.shadow {
-moz-box-shadow:inset 0 0 10px #000000;
-webkit-box-shadow:inset 0 0 10px #000000;
box-shadow:inset 0 0 10px #000000;
}
29、取消IE文本框的滚动条
textarea { overflow: auto; }
30、图片预加载
所谓的图片预加载技术,也就是加载一个图片的时候,为了减轻网页的压力,将图片衰减后先显示出来,然后再慢慢加载,你就会看到一个图片由模糊突然变得清淅起来,这就是预加载的一种。这段代码就完成了图片的预加载功能,你可以点击一个小图然后看到大图慢慢变得清淅,直至加载完成。
在此特意在361源码网上跟大家分享一段比较常规的图片预加载代码:
<head>
<meta http-equiv="Content-Type" content="text/html; charset=gb2312" />
<title>图片预加载</title>
<style type="text/css">
<!--
body{background:#000; color:#FFFFFF; }
.big-img{height: 390px; text-align:center; }
ol,ul{list-style:none}
ul{width: 632px; height: 56px; margin:10px auto; }
li{float:left; width: 200px; height: 53px; margin-right:10px; }
ul li img{ cursor:pointer}
-->
</style>
</head>
<body>
<div class="big-img"><img id="showImg" width="500" height="375" src="http://www.cuoxin.com/uploads/allimg/170826/1-1FR61A6150-L.jpg" alt="" /></div>
<ul id="imgList">
<li><img src="http://www.cuoxin.com/uploads/allimg/170826/1-1FR60ZU20-L.jpg" /></li>
<li><img src="http://www.cuoxin.com/uploads/allimg/170826/1-1FR61A6150-L.jpg" /></li>
</ul>
<script type="text/javascript">
var imgL=document.getElementById("imgList").getElementsByTagName("img");
var imgURL="http://www.cuoxin.com/uploads/allimg/170826/";
var bigImg=new Array("1-1FR61A6150-L.jpg","1-1FR60ZU20-L.jpg");
var imgshow=new Image();
for (var i = 0; i < imgL.length; i++) {
(function() {
var p = i
imgL[i].onclick = function() {
document.getElementById("showImg").src = this.src;
imgshow.src = imgURL + bigImg[p];
imgshow.onload = function() {
document.getElementById("showImg").src = this.src;
}
}
})()
}
</script>
</body>
</html>
好了,到这里关于网站中经常使用的CSS代码以及使用技巧就和大家分享完了,如果有什么不明白的可以加群讨论学习。
以上就是30条网站常用CSS代码及使用技巧的全部内容,希望对大家的学习和解决疑问有所帮助,也希望大家多多支持错新网。新闻热点

疑难解答