1.备份Apache服务的主配置文件
[root@KCentOS5C ~]# cp /etc/httpd/conf/httpd.conf /etc/httpd/conf/httpd.conf.backup
2.linux系统中配置Apache服务的主配置文件
[root@KCentOS5C ~]# vi /etc/httpd/conf/httpd.conf
这里主要改动以下这些参数:
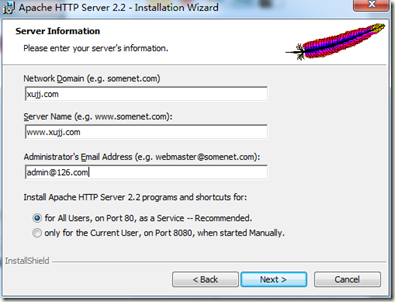
ServerName *:80
配置Apache的服务器名,如果有域名的话请填写正确的服务器名。
Include conf.d/*.conf (/etc/httpd/conf.d)
确认Apache扩展配置文件的存放路径。
3.查看Nagios网页配置模板文件
- [root@KCentOS5C ~]# less nagios-2.9/sample-config/httpd.conf
- # SAMPLE CONFIG SNIPPETS FOR APACHE WEB SERVER
- # Last Modified: 11-26-2005
- #
- # This file contains examples of entries that need
- # to be incorporated into your Apache web server
- # configuration file. Customize the paths, etc. as
- # needed to fit your system.
- #setting for nagios
- ScriptAlias /nagios/cgi-bin "/usr/local/nagios/sbin" ###设定了Nagios的CGI执行目录对应的系统路径。
- # SSLRequireSSL
- Options ExecCGI
- AllowOverride None
- Order allow,deny
- Allow from all
- # Order deny,allow
- # Deny from all
- # Allow from 127.0.0.1
- AuthName "Nagios Access"
- AuthType Basic
- AuthUserFile /usr/local/nagios/etc/htpasswd.user ###这里指定了访问用户帐户库文件。
- Require valid-user
- Alias /nagios "/usr/local/nagios/share" ###设定了Nagios的网页URL对应的系统路径。
- # SSLRequireSSL
- Options None
- AllowOverride None
- Order allow,deny
- Allow from all
- # Order deny,allow
- # Deny from all
- # Allow from 127.0.0.1
- AuthName "Nagios Access"
- AuthType Basic
- AuthUserFile /usr/local/nagios/etc/htpasswd.user ###这里指定了访问用户帐户库文件
- Require valid-user
- {######将#setting for nagios --这一段加到/usr/local/apache/conf/httpd.conf的末尾。
- 用/usr/local/apache/bin/apachctl configtest 检测配置 --help查看##########}
基本上这个文件可以直接使用。根据这个配置文件中指定的AuthUserFile项,它指定的是通过Apache访问Nagios的合法用户的帐户名单库文件,需要使用htpasswd命令对这个名单库进行用户的添加。而默认安装环境下在/usr/local/nagios/etc/目录下是没有htpasswd.user这个文件的,所以需要手动添加。请特别注意,用root身份建立的htpasswd.user文件的权限问题,应该在建立该文件完毕后立即更改为nagios用户nagios组的所有权,并且要增加Nagios同组用户读写权限。
4.整合Nagios网页配置文件到Apache中
将Nagios网页配置文件作为Apache的扩展配置文件复制改名到Apache的扩展配置文件目录/etc/httpd/conf.d/目录下
[root@KCentOS5C ~]# cp nagios-2.9/sample-config/httpd.conf /etc/httpd/conf.d/nagios-httpd.conf
5.建立Nagios的网页访问用户帐户文件(这里必须要与Nagios网页配置文件当中AuthUserFile指定的路径文件名一致)
[root@KCentOS5C ~]# touch /usr/local/nagios/etc/htpasswd.user
6.更改Nagios网页访问用户帐户文件的属主
[root@KCentOS5C ~]# chown nagios.nagios /usr/local/nagios/etc/htpasswd.user
7.对Nagios网页访问用户帐户文件增加同组成员读写权限(这主要是赋给apache这个系统用户)
[root@KCentOS5C ~]# chmod g+wr /usr/local/nagios/etc/htpasswd.user
8.察看Nagios网页访问用户帐户文件的属性信息
[root@KCentOS5C ~]# ll /usr/local/nagios/etc/htpasswd.user
-rw-rw-r-- 1 nagios nagios 0 Oct 5 14:05 /usr/local/nagios/etc/htpasswd.user
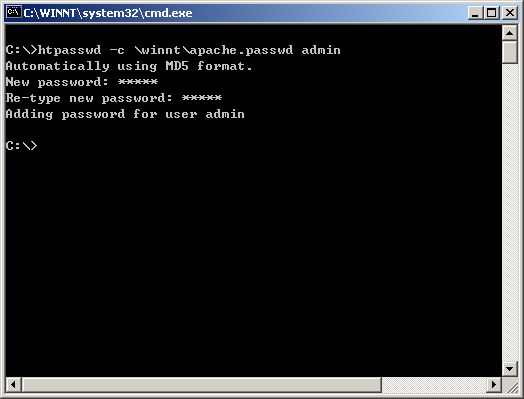
9.添加htpasswd.user用户
我添加了一个kanecruise用户,口令是123456。
[root@KCentOS5C ~]# htpasswd -m /usr/local/nagios/etc/htpasswd.user kanecruise
New password: 123456
Re-type new password: 123456
Adding password for user kanecruise
10.查看htpasswd的使用方法,这里我就解释一些比较重要和常用的。
[root@KCentOS5C ~]# htpasswd
Usage:
htpasswd [-cmdpsD] passwordfile username
htpasswd -b[cmdpsD] passwordfile username password
htpasswd -n[mdps] username
htpasswd -nb[mdps] username password
◆-c Create a new file.
建立新的帐户库文件。
◆-n Don't update file; display results on stdout.
◆-m Force MD5 encryption of the password.
添加一个MD5口令加密的新用户。
◆-d Force CRYPT encryption of the password (default).
◆-p Do not encrypt the password (plaintext).
添加一个口令不加密的新用户。
◆-s Force SHA encryption of the password.
添加一个SHA口令加密的新用户。
◆-b Use the password from the command line rather than prompting for it.
◆-D Delete the specified user.
删除一个指定的用户
On Windows, NetWare and TPF systems the '-m' flag is used by default.
在Windows、NetWare以及TPF这些操作系统中“-m”参数(启用MD5对口令加密)是默认使用的
On all other systems, the '-p' flag will probably not work.
在其他的所有操作系统中“-p”(不对口令启用加密)参数将可能会引起失败。
11.检查htpasswd帐户文件
[root@KCentOS5C ~]# cat /usr/local/nagios/etc/htpasswd.user
kanecruise:$apr1$Qwk9h/..$HaRakpabADGZL10dwPcrx1
用户添加正确,并且口令都以MD5的方式加密了。
以上讲解的是在linux系统中配置Apache服务。
新闻热点


疑难解答
图片精选