我的环境:
A:RedHatEnterPRise6.2 ip:192.168.16.12 此机作测试端
B:RedHatEnterprise6.2 IP:192.168.16.13 此机做FTP服务端
B机上搭建FTP服务器:
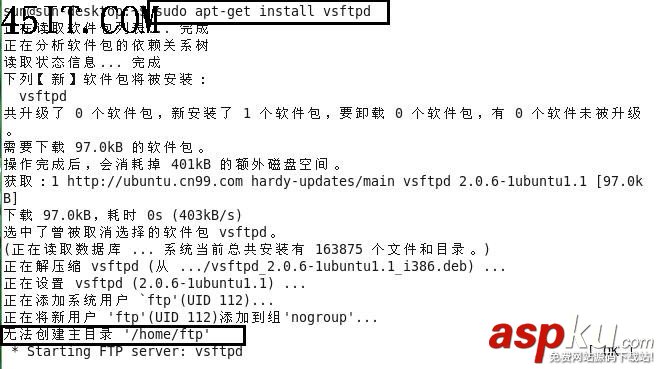
下载并安装vsftpd-2.2.2-6.el6_0.1.i686
[root@redhat6-3~]#rpm-ivhvsftpd-2.2.2-6.el6_0.1.i686.rpm
创建测试用户:
[root@redhat6-3~]#useraddtuantuan-d/var/ftp/ttftp-s/sbin/nologin
[root@redhat6-3~]#useraddtuantuan-s/sbin/nologin
[root@redhat6-3~]#passwdtuantuan
NewpassWord:
Retypenewpassword:
passwd:allauthenticationtokensupdatedsuccessfully.
查看一下新创建的用户配置
[root@redhat6-3~]#tail-1/etc/passwd
tuantuan:x:504:504::/var/ftp/ttftp:/sbin/nologin
修改配置文件:
首先来看vsftp的配置文件,常使用的配置如下:
[root@redhat6-3~]#grep-v"#"/etc/vsftpd/vsftpd.conf
anonymous_enable=YES //是否启动匿名用户登入
local_enable=YES //是否允许本地用户登入
write_enable=YES //是否允许用户写入
local_umask=022 //用户目录下创建文件默认权限,此处默认权限是777-022=755
dirmessage_enable=YES
xferlog_enable=YES //是否使用日志
connect_from_port_20=YES
xferlog_std_format=YES
listen=YES //是否使用监听,若不使用将使用超级守护进程
pam_service_name=vsftpd
userlist_enable=YES
tcp_wrappers=YES //是否启用用/etc/hosts.allow或/etc/hosts.deny文件生效
以上是默认的ftp参数,我们还需添加以下参数来完成配置:
chroot_local_user=YES //是否禁止本地用户离开自己的主目录
xferlog_file=/var/log/vsftpd.log //设置ftp的日志路径
idle_session_timeout=600 //设置回话等待时间
data_connection_timeout=120 //设置数据等待时间
ftpd_banner=WelcometoconnectmyFTP! //设置成功登入提示
完成配置后重启一下ftp,查看进程并在A机上登入测试:
[root@redhat6-3~]#netstat-antp|grep21
tcp000.0.0.0:1110.0.0.0:*LISTEN1221/rpcbind
tcp000.0.0.0:210.0.0.0:*LISTEN1926/vsftpd
tcp00:::111:::*LISTEN1221/rpcbind
客户端需安装ftp-0.17-51.1.el6.i686来支持ftp命令
在A上:
[root@redhat6-2Packages]#rpm-ivhftp-0.17-51.1.el6.i686.rpm
[root@redhat6-2Packages]#ftp192.168.16.13
Connectedto192.168.16.13(192.168.16.13).
220WelcometoconnectmyFTP!
Name(192.168.16.13:root):tuantuan
331Pleasespecifythepassword.
Password:
230Loginsuccessful.
RemotesystemtypeisUNIX.
Usingbinarymodetotransferfiles.
help命令查看ftp的命令
ftp>help
Commandsmaybeabbreviated.Commandsare:
!debugmdirsendportsite
$dir mgetputsize
accountdisconnect mkdirpwdstatus
appendexitmlsquitstruct
asciiformmodequotesystem
bellgetmodtimerecvsunique
binary glob mputregettenex
bye hashnewerrstatustick
case help nmaprhelptrace
cd idle nlistrenametype
cdupimagentransresetuser
chmodlcdopenrestartumask
close lspromptrmdirverbose
cr macdefpassiverunique?
deletemdeleteproxysend
创建一个目录,并想改目录内传送一个文件:
ftp>cdtest
250Directorysuccessfullychanged.
ftp>!ls
anaconda-ks.cfgLAMPMySQL-5.5.25.tar.gz
install.logmysql-5.1.66-linux-i686-glibc23.tar.gz
ftp>putmysql-5.5.25.tar.gz
local:mysql-5.5.25.tar.gzremote:mysql-5.5.25.tar.gz
227EnteringPassiveMode(192,168,16,13,216,59).
150Oktosenddata.
226Transfercomplete.
24639871bytessentin1.1secs(22359.01Kbytes/sec)
切换到服务端查看该目录下的文件:
[root@redhat6-3~]#cd/var/ftp/ttftp/test/
[root@redhat6-3test]#ls
mysql-5.5.25.tar.gz
也可以在windows下登入该ftp,更加方便:
打开我的电脑输入ftp://tuantuan@192.168.16.13

配置超级守护进程启动vsftp
需要装xinetd服务管理工具:
[root@redhat6-3~]#rpm-ivhxinetd-2.3.14-33.el6.i686.rpm
[root@redhat6-3~]#cp-rf/usr/share/doc/vsftpd-2.2.2/vsftpd.xinetd/etc/xinetd.d/vsftpd
[root@redhat6-3~]#vi/etc/xinetd.d/vsftpd
#default:off
#description:ThevsftpdFTPserverservesFTPconnections.Ituses/
#normal,unencryptedusernamesandpasswordsforauthentication.
serviceftp
{
socket_type=stream
wait=no
user=root
server=/usr/sbin/vsftpd
server_args=/etc/vsftpd/vsftpd.conf
nice=10
disable=no//将yes改为no即可
flags=IPv4
}
修改配置文件
#listen=YES
将listen注释掉即可
建议write_enable=YES改为NO
将vsftpd的服务停掉:
[root@redhat6-3xinetd.d]#servicevsftpdstop
Shuttingdownvsftpd:[OK]
重启xinted服务:
[root@redhat6-3etc]#servicexinetdrestart
Stoppingxinetd:[OK]
Startingxinetd: [OK]
查看端口是否存在:
[root@redhat6-3etc]#netstat-antp|grep21
tcp000.0.0.0:1110.0.0.0:*LISTEN1221/rpcbind
tcp000.0.0.0:210.0.0.0:*LISTEN4369/xinetd
tcp00:::111:::*LISTEN1221/rpcbind
因为启用超级进程来管理vsftp,所以这时候启动vsftpd会报如下错误:
[root@redhat6-3etc]#servicevsftpdstart
Startingvsftpdforvsftpd:500OOPS:vsftpd:notconfiguredforstandalone,mustbestartedfrominetd
若不想启用超级进程管理,将配置文件中的listen=YES注释取消即可
测试端登入测试:
[root@redhat6-2~]#ftp192.168.16.13
Connectedto192.168.16.13(192.168.16.13).
220WelcometoconnectmyFTP!
Name(192.168.16.13:root):tuantuan
331Pleasespecifythepassword.
Password:
230Loginsuccessful.
RemotesystemtypeisUNIX.
Usingbinarymodetotransferfiles.
ftp>bye
221Goodbye.
windows登入测试:
同上次方法一样打开我的电脑或cmd(调用浏览器)输入:tp://tuantuan@192.168.16.13/


输入用户名和密码后登入进行操作即可


简单的ftp服务器配置完成!
新闻热点


疑难解答